For this post, I’m going to do something a little different and combine a couple different installs. In Bonnie Mod #16, I installed the Maund Speed Fender Eliminator Kit. I installed all four Lockhart-Phillips turn signals (with the help of the New Bonneville harness and interconnects) but didn’t document the front turn signals. I’m going to continue here with the install of the front turn signals and then continue with their subsequent relocation. Follow along and it’ll all make sense.

As you can see, the Lockhart-Phillips (L-Ps) are black aluminum body, dual filament/three wire (allowing for the use of running lights) with bullet connectors. The Triumph connectors are a square type plug. In order to fit the L-Ps into the Triumph wiring harness, you can either cut and splice the wires or buy an interconnect. I went the interconnect route as I felt this was a cleaner, easier solution and would keep the original wiring intact. Either way is fine, it’s up to you. The interconnects that I purchased were the New Bonneville interconnects. A bit pricey but well made. Honestly, it would have been more expensive for me to gather the necessary bits together to make my own. Note that these interconnects only support ground and blinker light. To utilize the L-P running light, you’ll need to draw power from another spot in the Triumph harness (I haven’t done this yet).

Okay, so let’s begin. We’re removing the stock turn signals and putting the L-Ps in their place.

The headlamp needs to be removed from the headlamp ears and opened up to expose the wiring. In hindsight, I recommend exposing the wires first and then removing the headlamp but either way works.
Start by placing a towel or jacket over the front fender. You are going to want to protect it from getting scratched during this mod as the headlamp spills out its entrails.
The headlamp is held to the ears by two 12mm bolts. Remove these, taking care to mind the collars nestled in the ears. They will fall out to the floor if you’re not careful.


Go ahead and loosen the nuts holding the turn signals to the headlamp ears. Now we have to disconnect their wires from the wiring harness. There are two small Phillips screws on the headlamp in the 5:00 o’clock and 7:00 o’clock position. Unscrew these, carefully pull the headlamp away from its housing, and place it on the towel on top of the front fender. Man, it’s a mess in there, isn’t it!

Now, you need to trace the turn signal wires to where they connect and unplug them. Take care to keep left and right visually separated. This will make it easier when you go to connect the L-Ps. Now gently pull the stock turn signals and wiring out from back of the headlamp casing and ears. You’ll find that you have to shimmy the wiring back and forth to get them through the nuts.

Time for the New Bonneville interconnects. Pull those out. They come with concise directions, by the way.

Install the Lockhart-Phillips turn signals into the ears and plug in the interconnects. As stated earlier, the New Bonneville interconnects only seat the ground and blinker wires of the Lockhart-Phillips turn signal. The third wire of the L-P is a running light. You don’t need it but it is nice to have in terms of safety. If you want to utilize it, you will need to tap into another wire in the harness. Otherwise, wrap it in some electrical tape and let it hang inside the headlamp case.

Run the wiring back into the headlamp casing and plug into the Triumph wiring harness.


Once the wires are properly seated, go ahead and run a quick test to ensure that all the lights are working properly. If all is good, put everything back together.
Well, guess what? The stems of the Lockhart-Phillips are much too long and crash into the headlamp.

In fact, if I had tightened them properly, they would have dented the headlamp. Maund Speed made no mention of this which I found a bit disappointing.
I had a few choices…
1. add in a spacer that would create a shorter shaft that needed to be tightened (thus not crashing into the headlamp),
2. purchase new shorter turn signals,
3. relocate the turn signals.
Option #1 made the easiest sense as it would require the least amount of work, and it was the one I was going to go with. However, during this time, Bryan of Joker Machine sent me a massively cool pair of clip-ons to try. To do so would require removing the stock headlamp ears which would require relocating the turn signals, so there you have it. Option #3 was decided – relocate the turn signals. (BTW, stay tuned for the clip-on install. I’m curious to see how they compare to the Dime City Cycle Clubman handlebar I installed in my first mod.)
A Google search of “triumph bonneville front signal relocator” quickly brought me to British Customs’ Front Turn Signal Bracket. Perfect, and only $20. One of the few fair prices for an after market Triumph bit, IMO.

Okay, so here we go again…
In a nutshell what needs to be done is to open the headlamp, disconnect the turn signal wiring from the harness inside the headlamp, remove the headlamp from the ears, remove the signals from the ears, install the bracket behind the rectifier, attach the turn signals to it, wire the turn signals back into the harness, reattach the headlamp cover, and reattach the headlamp to the ears. Whew, I guess we’re done. But seriously, let’s go step by step…
First remove the head lamp from the rabbit ears…
(make sure that you place protective covering on the front fender in case the head lamp falls against it. You’ll notice that this time I’m employing the Union Jack.)

We’ve been down this road before. Pop open the head lamp, remove the turn signals… (obviously, there is wiggle room in the work flow).

Now to install the British Customs turn signal relocator bracket. This is extremely easy. We simply unscrew the two bolts holding the rectifier, place the bracket behind it, and rebolt the coupled assembly. Note that British Customs supplies a pair of Allen socket head bolts but I opted to reuse the Triumph bolts


Run the wires back into the headlamp case and reattach to the Triumph wiring harness.

If you read my Joker Machine brake light mod post, you know that I utilized heat shrink tubing to ensure weather-proof seals. This is another ideal situation for the stuff. I’m loving it!

Test the electrics to make sure that all is good.

And pack everything back up.


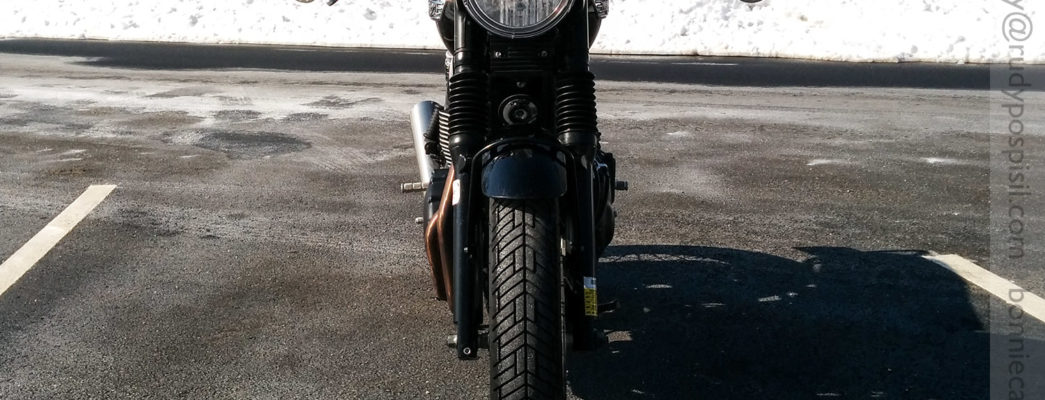
We went from this…

to this…

to this.

Whaddya think? For me, there isn’t a huge difference whether the Lockhart-Phillips are located on the sides of the headlamp or underneath it. However, since I’m going to be installing some clip ons, that will require replacing the Triumph headlamp ears and relocating the turn signals.
Tools Required:
12mm socket
5mm socket
Crescent wrench
Small Philips head screwdriver
Heat shrink tubing
Bic Lighter
Company URL:
British Customs
New Bonneville
Lockhart-Phillips
Price:
$20 – British Customs Front Turn Signal Bracket
$22 – New Bonneville Front Signal Wiring Interconnects
Lockhart Phillips Short Stalk Turn Signals
Rudy,
You asked, “What do you think?” so I’ll tell you. I don’t like it. For some reason having those turn signals down low just bugs me. Of course it is the simple solution but I think they look a lot better and the wiring is less visible when they are mounted to the headlight ears. With clip-ons you would have to go with the JM ears and signal adaptors. Here is a link to the http://jokermachine.com/products/triumph/lighting-and-license-plate-frames/headlight-bracket-turn-signal-mounts.html Very pricey but clean IMO – AND!!! Not my money or bike LOL
Love your blog. Keep it up.
On another note I got my TecBike shocks and they fit perfect with my little saddle bags. I need to go ride a few rough roads but of all weekends – it looks like rain. Huge drought in So Calif, hasn’t rained in forever but today, when I need to test and tune, its going to rain 🙂
Im going to look into lowering the front fender 1/8-1/4 inch on my Mag Bonnie. Get it to hug the tire a bit better so let the rain come.
Ride safe.
Rich
Hey Rich. I appreciate the honesty and after sitting with them for a week, I think I have to agree. I purchased a pair of inexpensive headlight ears off of eBay and I’m thinking of drilling holes into them for the turn signals. They’re minimal load bearing at best so I should be okay. If I go this route, I’m only out $20 for the B-C bracket.
I’m glad that all went well with your TEC shocks, happy that I could help.
Good luck with the rain. The weather is getting nicer here in NY, albeit a bit chilly at the moment.
Cheers.
Rudy
Thanks for the write up, here and on the FEK. Your blog is awesome. I was looking for more information on the Maund products, but their website is pretty bleak. Good stuff!
Thanks, Peter. I’m glad you found it helpful. Rudy
How did you keep the aftermarket turn signals in the original location by the headlight? I called British Customs and they said that the ignition would get in the way.
The threaded part of those lights should be able to be removed by loosening that phillips screw that clamps the light onto the threaded shaft. Once that is done you can slide it off the wires and then cut the threaded shaft to the desired length then feed the wires back through and re-attach it to the light. You can even file the rough ends of the threaded shaft after cutting and this should not affect the nut being able to thread back on. This will allow the lights to be installed in their original position and thus a cleaner look. Good luck and nice bike!
I ran into the same problem with the very same signals. My solution was to disassemble the lights so I could cut down the mounting stalks. The hardest part was threading the wires back through the protective tubing and then crimping on the connectors. This was needed on the rears as well using both the British Customs shock mount and Motone rear frame style. I was then able to use the stock front mounting location for a clean looking install.