If you’ve been following along, you know that the first mod I did to my 2014 Triumph Bonneville T100 Black motorcycle was swapping the stock handlebar with a Dime City Clubman-type “Speed” drop handlebar. A very cool new look, to say the least.
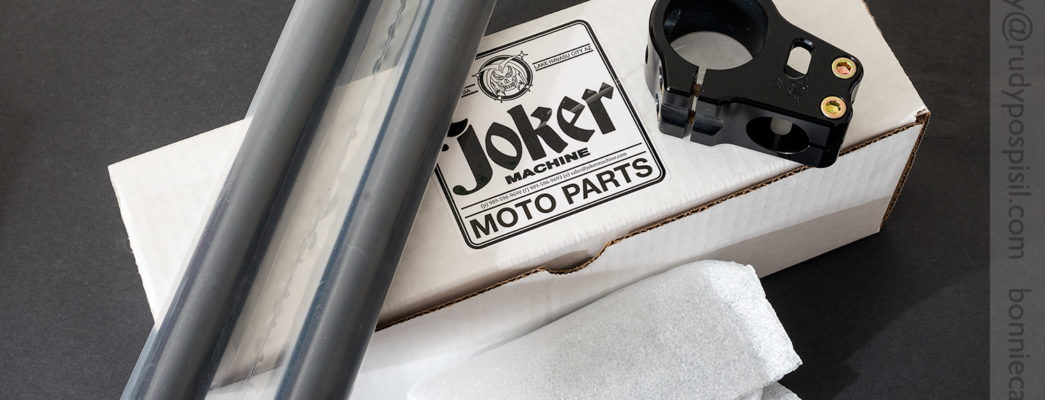
Recently, Joker Machine sent me a pair of clip-on handlebars to review.

Being “zero-angle,” I was very interested in trying them. The Dime City bar angles downward quite a bit and I’ve found this to cause some pain in the wrists over time.
Opening up the Joker Machine clip-ons, I was quite impressed with the build quality. Specs-wise, they fit onto 41mm fork tubes and have 1″ bars.
The set consists of two fork tube clamps made of CNC machined billet aluminum and two 1″ diameter handlebars made of 1/8″ thick wall 6061-T6 tubing. Each clamp comes with four M6 bolts with socket heads.

The clamps are a one-piece design, therefore we will need to pop off the top yoke/triple tree in order to slide the clamps onto the forks.
[Note: Make sure to cover your tank and headlamp with thick towels or pads for protection against scratches.]
Because this is a mod of a mod, I’m not going to go as in-depth as I have in the past. However, I will point out a couple new caveats. (For more in-depth, take a look at the Dime City handlebar install which documents the removal of the clutch and throttle assemblies, and also the SMT MOTO headlamp bracket install which details the removal of the top yoke. I get very detailed in these two posts. Call it laziness but I don’t want to repeat myself in this post.)

Bear with me as I’m going to backtrack in a moment. I have bar-end mirrors, so I removed those. Following that, I released the Dime City bar followed by removing the clutch and throttle housings. The bar is held in place by two top clamps held down by four bolts. The clutch and throttle housings each have two socket head bolts that need to be loosened. They don’t need removing, just loosened, and the assemblies will slide right off.
Oh, remember this trick? The grip on the clutch (left) side is extremely difficult to slide off. Take a small flat head screwdriver, apply a bit of grease on it, insert it in between the grip and bar, and rotate it around. The grip will then slide right off. Make sure to clean off all the residual grease.


Okay, here’s the part where I need to backtrack. I shouldn’t have removed the handlebar first and I’ll tell you why.
The handlebar clamps are bolted through the top yoke. Underneath is a nut which needs to be loosened.

However, if you look at the head of the bolt, you’ll notice that there is absolutely no room to use a wrench or socket to restrain it.

So what happens is that as you loosen the nut, the clamp will begin spinning and you’ll quickly begin wasting effort.
I recommend loosening the yoke bolts first while you still have the handlebar in place. That will prevent the clamps from spinning. In my case, I grabbed one of the Joker Machine bars and used it to lock down the clamps while I loosened them.

Once the handlebar clamp and bolt are removed from the top yoke, you’ll be left with a pair of metal sleeves and rubber grommets.


You can leave them in if you wish. I opted to pull them out. They’re not screwed in. To remove them, simply pull off the top portion and then push out the bottom portion.

I rather like the holes…

Now we remove the top yoke/triple tree. This consists of loosening the two fork clamp bolts and removing the steering stem nut. Make sure that you have a towel over your headlamp. (See BONNIE MOD #22 for more in-depth play-by-play of removing the top yoke.)

Slide the Joker Machine clip-ons onto the fork tubes. The Joker Machine clamps are engraved with an “L” and and “R” (left/right) so take care as to which side is which. Also, make sure that the Joker logo is facing upwards and the USA is on the bottom. Don’t tighten them yet.

Position the top yoke back into place and tighten it down, slide your controls onto the handlebars, and begin fine-tuning the bars.

Okay, here is where you’re going to hit a snag if you have a late-model Triumph Bonneville T100 as I do. The front brake master cylinder is part of the throttle assembly, a one-piece unit. As such, it prevents being able to properly adjust the right side. Depending on how you rotate it, either the banjo bolt or the reservoir smacks into the Joker Machine fork clamp.

The left side presents no problem and allows a lot of room for adjustment.

Also, mind your tank as you’re making adjustments. It’s very easy for the clutch and throttle assemblies to crash into it, along with your hands, if you’re not careful with your adjustments. What is great with these clip-ons is that you have three areas that you can adjust independent of one another – extension, angle, and height. The drop handlebar, on the other hand, is a one-piece unit that can only be rotated. I highly recommend using blue Loctite on the bolt threads. Also, mark the bolt heads at the 6 o’clock position. These are critical junctures. You want to stay vigilant that the bolts stay in position.

Bonneville T100. Bonnie Café.

Bonneville T100. Bonnie Café.
I also recommend capping off the bars with some sort of cap. Otherwise, water and grime will collect in them. I found Odi rubber bar end caps from my neighborhood bicycle shop for $1 each that worked perfectly. They come in several different colors. I chose black.

Overall, I really like these bars. They are definitely “gentler” on my wrists. I’ve been told, however, that the optimum angle is 7° as that is the natural angle of our wrists when held out in front of us. The Joker Machine are at 0°. Until I try a 7° bars, I can’t speak to the difference.
I’m a bit concerned about how far out the right bar extends due to the front brake reservoir. I’m looking into swapping in a “urine cup” assembly. If anyone has another suggestion, I’m all ears.
However, I do believe that the right bar has enough of a foothold inside the fork clamp. If there is an engineer out there who thinks otherwise, please let us know.

I’ll leave you with some “after” shots. As you can see, the instrument cluster is now sticking out. My next steps are to replace the cluster bracket with a flat bracket, and to do this will require relocating the rectifier that is currently preventing the headlamp from being lowered.


If you want to view the previous two iterations of handlebars on my bike, visit my State of the Bonnie section. Feel free to let us know which you prefer.
Company URL:
Joker Machine
Price:
$170—Joker Machine Clip On Handlebars
UPDATE, 2015.05.31
I have a lot of bits on my bike from Joker Machine and I’m very happy with them. Their quality is top rate. However, after riding these clip ons for a few hundred miles, I hate to admit but I’m not completely happy with this particular mod. The quality is superb, it’s the engineering that is problematic. The “zero angle” has proven to cause issues. While my wrists are better off, I’m now finding that the muscles at the base of my thumbs have become painful. What’s happening is that my hands are attempting to rest at the so-called 7° sweet spot and, as such, my thumbs are straining against the zero-degree bars which, in turn, is causing muscular pain. I was originally thinking of having to redo the throttle assembly in order to properly fit the right Joker Machine clip on but I began exploring the option of using new bars. I ordered a pair of Tarozzi clip ons from Dime City (go figure, what goes around, comes around). Not only do they allow for adjustable angles, it also appears that they will allow clearance of the one-piece brake reservoir assembly. Stay tuned for a new install.
I finally fitted up a set of the Paolo Tarozzi clip ons that Iv’e had lying around for over a year. Two things to beware of:-
1) They only come in silver finish and with chrome tubes (which are shorter than the Joker Machine items). I had them powder coated black as I preferred that look.
2) The tubes are only available in 7/8″, original bars and controls are 1″. I shimmed mine with some 25mm plastic tube and one turn of duct tape, which works fine.
The stock brake reservoir will clear the clamp, just, but it has to be in the correct orientation.
Yeah, I’m not crazy about the silver either. Good call with the powder coating. They actually offer a 1″ bar now. Unfortunately, you have to buy it separately. Good news to hear that the reservoir will clear. Thanks. Rudy
Typical, should have waited!
If you do powder coat, you may want to mask off the conical contact surfaces between the bar clamp and the tube clamp. Stops the powder coating splitting and gives a more secure metal to metal contact.
Setting up can be a bit tricky with so many variables, I am considering making a template that will drop into the yoke original holes as a guide. Good luck with that mod.
I was thinking about fabricating some sleeves and then I just found out that Joker Machine sells sleeves for Harleys that will allow one to use 1″ controls on a 7/8″ bar. I’m going to have to check those out.
Do you mean “urine cup” like this: Free Spirits Direct Mount Brake Reservoir ?
I find it http://www.newbonneville.com