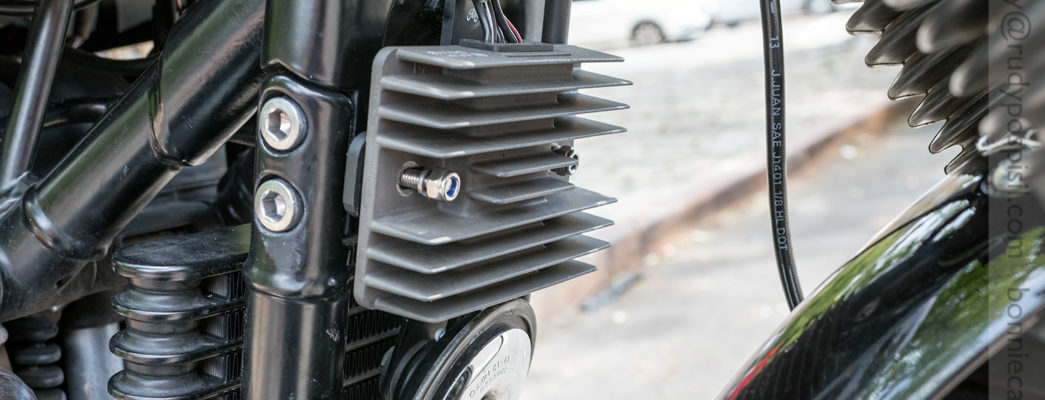
The mods keep coming! This latest one is part of a series, one in which I’ve swapped out the handlebars (for a second time) and “need” to lower the headlamp in order to lower the instrument cluster. I lowered the headlamp when I installed the SMT MOTO headlamp ears but the rectifier prevented the headlamp being lowered enough. So this post is all about relocating the rectifier, a fairly inexpensive and easy task.
BONNIE FUN FACT: The rectifier converts alternating current into direct current. The bike’s alternator converts rotating power from the engine into AC. The rectifier converts AC channeled through it into DC which can then be used to charge the battery and power other DC systems on the bike. BTW, if you’re wondering why the shape on the Bonneville, it’s one big heat sink.
What we’ll be doing is attaching the Bonneville’s recifier and horn onto a bracket, Motone in this case, and using the horn’s point of attachment for the new bracketed assembly. Easiest peasy, all around.
Why Motone? British Customs seems to be the go-to but I found that the Motone saved me $17. Plus, it’s a UK part and my Bonnie loves that.


I ordered the Motone part from Outpost Cycle. They’re in Torrance, CA (I know… SoCal, not NoCal. Sometimes we have to “lower” ourselves. 🙂 ) but they have an eBay store where they sell the part with free shipping. The curves are a bit rough on the bracket but it makes no matter. The bracket is solid, serves its purpose, and is pretty much completely hidden in doing so.
Let’s start. Again, in a nutshell, we’ll be removing the rectifier, removing the horn, attaching both to the Motone bracket, and, finally, attaching the Motone bracket (with rectifier and horn) to where the Triumph horn was originally attached. This will allow your headlamp to move further down your forks.

Begin by removing the rectifier from the frame. You’ll notice in the photo below that I have my blinkers connected to the same point. This is not stock and your situation may vary.

The rectifier will need to be attached further down the frame. You’ll quickly notice that more slack is needed in the wiring. You’ll have to pop open the head lamp and release the rectifier wire from the internal clip. This will give you enough play to pull the rectifier down.


Now let’s remove the horn…

Make sure that you keep the bolt. You will need it to attach the Motone bracket to the same point.

As always, use Blue to keep bolts from vibrating loose!!!

In order to attach the horn to the Motone bracket AND attach the bracket in the proper position, you’ll need to loosen the rear nut of the horn and rotate the horn attachment arm approximately 90°. As you try to put everything into place, this will become quickly apparent, so no worries there.

Tighten everything into place…

and BAM!, the headlamp can now be lowered all the way to the bottom of the forks!

FYI, I ordered a D9 lay flat bracket for the instrument cluster. As you can see, they’re sticking out like a pair of googly eyes.
Company URL:
Motone
Price:
29.95 + Free Shipping
