Hello, Triumph Fans! If you’ve been following along, you know that I swapped the handlebar (first with Dime City and then with Joker Machine), swapped out the headlamp brackets, lowered the turn signals, and lowered the rectifier using a Motone bracket. This left the speedo and tach sticking up like a pair of hermit crab eyes. Very goofy looking. Well, here is the ending of this series of mods – installing the instrument cluster into a D9 bracket that lays flat thus streamlining the front. I wanted a simple bracket that would recess the two gauges and the D9 seemed like it would fit the bill.
The D9 website has no pricing. You’ll need to write for a quote, there is no online shopping cart. Prepare for a bit of sticker shock along with a bit of a wait once you order it.
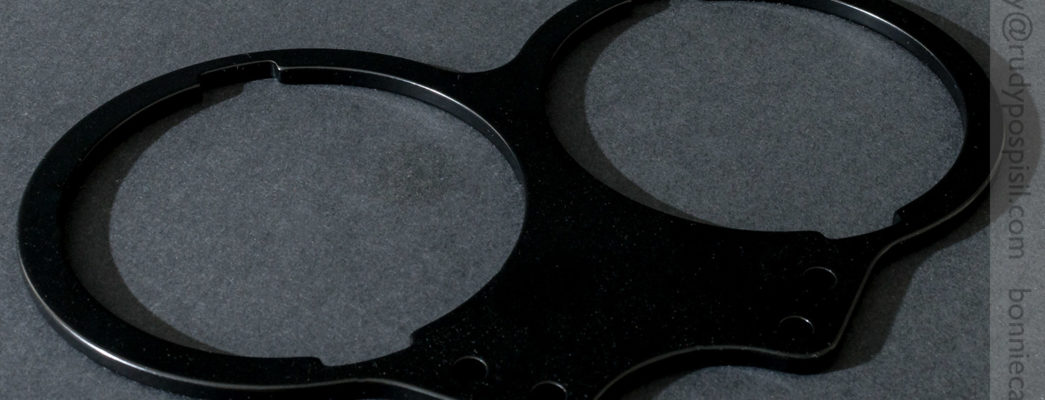
D9 has many, many bracket design options – I went with the VDO Standard Lay Flat V1 Bracket. After ponying up $136 via PayPal, the bracket arrived approximately 12 days later. My assumption is that each one is made on demand hence the high price and long wait.

The bracket is nicely machined and powder coated and comes with mounting hardware so that you don’t have to use the ugly Triumph bolts.

The install process is pretty straightforward, however there are a couple of caveats to be aware of albeit very minor.
The stock bracket is held to the top yoke with four bolts.

The instruments themselves are clamped to the bracket via the cups on the back which are each held in place by two tiny dome nuts.

Undo the the stock bracket from the top yoke and remove the four dome bolts on the back and then simply slide off the cups.

Don’t lose the bolts. Actually, we’ll be replacing the front bolts with the D9 bolts, so feel free to lose them. The rear four dome bolts, however… keep ’em, we’ll need to reuse them. The Pep Boy’s magnetic collapsible nuts & bolts cup has proven itself to be a lifesaver.

In order to remove the instruments from the bracket, we’ll need to remove the wire connection blocks from the back of the instruments.

These are extremely snug. You’ll need to pinch in the locking mechanisms and pull with a bit of effort. Be careful that you have a good grip and take it slow. You don’t want a speedo suddenly flying through the air.

Once the connectors are off, make sure to keep them far apart so that you can remember left from left. (Also remember that speedo is on the left and tach on the right.)

With the connectors off, the instruments can now be pulled off the bracket.

You’ll notice that there are two rubber seals/grommets/gaskets lining the bracket holes. Remove those ’cause we’ll need to reuse them.

Now that the stock bracket is free, reverse the above in order to install the D9 bracket. Start by taking the rubber seals and fitting them into the D9. There are notches at the top and bottom of each side of the bracket that match up to tabs on the rubber seals, so it’s easy to know how to fit them.

Make sure that the nubs are on the back and on the inside center. These are used as a shock mount to absorb vibrations.

Continue by fitting the speedo and tach back into the D9 bracket.

Replace the housing cups. Make sure that you place the cup with the push button on the left. (It’s used to reset the trip odometer.) Use Blue Loctite on the dome nuts.

As you go to fit your newly fitted D9 bracket, you’ll immediately discover that you can’t. The stock Triumph wiring routes through a coat hanger bracket which prevents nestling in the flat bracket.

No worries, this is an EASY fix. You can try bending the wire downwards but you might as well remove it.


With the wire removed, we now have plenty of room to mount the D9 bracket to the top yoke. Pull out the mounting hardware provided by D9. You can choose to reuse the stock Triumph bolts but they’re pretty ugly.

Lay the rubber grommets into position on the top yoke. If you have some sort of low tack adhesive, I recommend using it to keep the grommets in place as you position the bracket onto them. That will prevent them from moving.

Screw in the D9-provided bolts to finish mounting the D9 bracket to the top yoke. Be cafeful of over-tightening. As you can see in the photo below, I did and the rubber began splaying out. (I plan on seating the grommets in between a pair of washer to help prevent this.)

And there you have it. A huge improvement in looks, right proper for a café racer.


A pricey bit for the Bonneville but worth the financial sacrifice in my opinion. Cheers.
Company URL:
D9
Price:
$129 + $7 USPS Shipping